Introduction
Welcome to the Photography Badge home page. Here you will find everything you need to complete the photography badge. All you have to do is read or watch all the Learning sections and complete all the Challenge sections.
Learning
Learning sections will look like this. You just have to read these sections, you may need to refer back to them to complete the challenges.
Challenge
Challenge sections will look like this.
For most challenges you will need to take 1 or more photos. Once these are done email them with your name and ‘challenge number’ to gsl@1stbedworth.co.uk . If you are stuck on a challenge don’t worry we will take time out each Thursday for you to ask questions.
NOTICES
I will add any notices to this section so check back now and then to see if anything has been added…
Friday 26th June
Challenges 1, 2 & 3 added
Tuesday 30th June
This is the first week and I know some people may be struggling to get started as you are new to using your cameras and smart phones in this way. Don’t worry it will get easier and I can help you on Thursday night. Challenges don’t have a deadline so you won’t be in trouble if you don’t get it done in time.
Tuesday 30th June
Learning section added for Part 1 – What Makes a good photo. Images will be added to this part soon.
FAQs
Photo or Video option?
The Scout Photography Badge requirements are based around choosing one of two options Photo or Video. Due to how this badge course is being delivered only the Photo option is available to complete the badge via this course. Everyone on this badge course will however get first priority places on a film making weekend in 2021.
What are Thursday nights meetings for if all the info is on here?
These will continue until the badge is complete, don’t worry if you miss one you will be able to find information on here to help you catch up. Join the meeting between 8pm and 9pm. During this meeting you will see a demonstration related to the challenges you need to complete and have the opportunity to ask any questions about the challenges.
Do I have to get the challenges complete on time?
Challenges are linked to the badge requirements, by completing them all you will have completed the badge. If you do not complete a task in the week it is set this is absolutely fin, but you will need to complete eventually it to get the badge.
I don’t know how to complete the task?
Many of you will not be able to complete the task straight away as you may need help with camera settings or similar. We expect this to be the case and it is part of process of learning. This is what Thursday nights are for so we can help you if you need it. The important thing is to keep trying.
LINKS
Scout website badge requirements
https://members.scouts.org.uk/supportresources/4385/photographer-activity-badge/?cat=7,64,779&moduleID=10
Zoom meeting link
https://us02web.zoom.us/j/88012763949
Manual Camera App for Android
https://play.google.com/store/apps/details?id=com.lensesdev.manual.camera.professional&hl=en_GB
Manual Camera App for iPhone
https://apps.apple.com/us/app/procam-manual-control-camera/id1033780581
Part 1 – What makes a good photo
Learning
There are lots of things that make a photo good or bad and ultimately it comes down to if you like the photo or not. So it can be a very personal choice.
However as a photographer you will want to create a great photo, for others to look at that tells a story. How well you do this will come down to lots of different things.
Some things you can control in your camera such as exposure (we will come to this later) and some things you can control outside your camera, such as where you stand to take the photo. Here are a list of some things that you need to be aware of when taking a photo.
You should think about these things and make a choice about them each time you take a photo.
- Subject
- Focus
- Exposure
- Leading Lines
- Colour
- Crop
- Composition
- Does it tell a story? Is it interesting
Subject
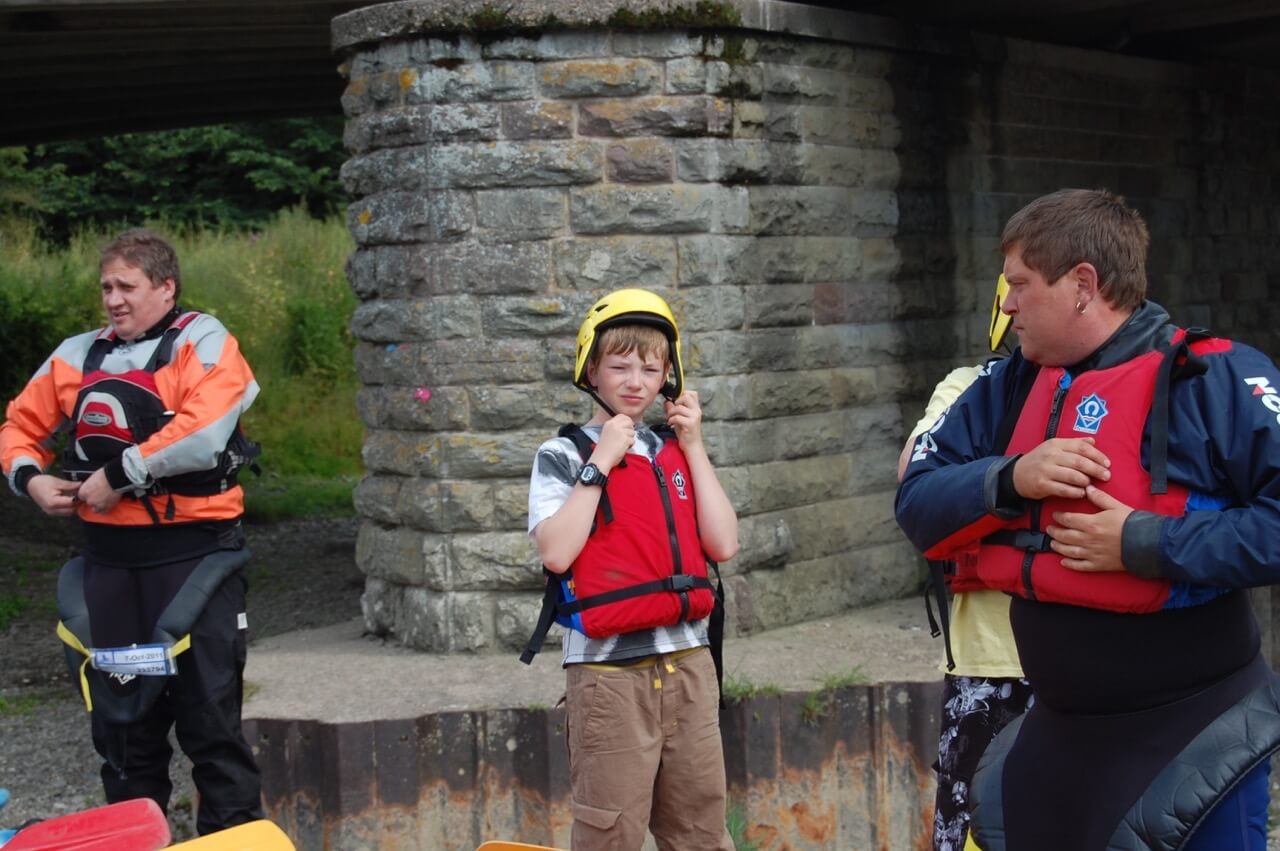
All images start with a subject, usually a person or an object that you are photographing. Maybe even a nice view if it is a landscape. A good image will have a subject that is clear to see and all the other things below will help to make the subject more clear.
Focus
Make sure your subject is in focus. This may be a fairly obvious one. If a photo is out of focus or blurry it’s usually not a good thing. However most photos have some things in focus and some things out of focus this is something you can control.
Exposure
This is how light or how dark a photo appears. A photo that is too light is called Over Exposed a photo that is too dark is called Under Exposed. Getting this right is one of the most important parts of controlling your camera and being able to take a photo. Most cameras do this for you automatically but if you can control this manually then you can start to create much better photos.
Leading Lines
These are lines created by things in the image that lead to the subject if the photographer has positioned themselves and the subject in a clever way. If you do not consider the lines created by things in the background then they can be very distracting and the photo may not be as good.
Colour
Colour is a really complicated part of photography, for now all you need to do is ask these questions. Are there too many different colours in the photo? Can I move things around to reduce this? Is there something like a bright yellow skip in the background that is distracting from the subject? Do the colours in the photo help the story in anyway?
Crop
Make sure your subject isn’t falling outside the frame of your photo. If it is make sure you are OK with that and you have chosen to do it on purpose.
Composition
Firstly you need to know there is a general rule with photography that things look better when you put your subject in the left or right third of an image. This means if you divided your photo into three sections (left, middle, right) you would always put your subject in the left or right section. You can also put them in the middle but make sure things are fairly symmetrical or it will start to look wrong again. Also how does your subject relate to other items in the photo. For example is a racing driver standing next to his car which is in the background?
Does it tell a story? Is it interesting?
This is the most important thing with any photo I look at and if you do nothing else follow this rule…Interesting photos are made when you photograph interesting things. If you get this bit right the rest will be easy. No one wants to see a boring photo so if the subject and the story are interesting then you have nailed it. Think about this before you pick up your camera.
Challenge 1
Find three photos you think are good and three photos you think are bad.
Once these are done email them with your name and ‘challenge number’ to gsl@1stbedworth.co.uk . If you are stuck on a challenge don’t worry we will take time out each Thursday for you to ask questions.
Part 2 – Camera Control
In part 1 you learned all the things that make a good or bad photo. Now you need to know how to control these things when you take a photo as some of these things can only be controlled with your camera
- Focus
- Exposure
- Crop
- Composition
Focus
To control focus on a smartphone you usually just have to tap on the part you want to be in focus. It is that simple. If you are using a manual camera app you may be able to control the focus manually using a slider in the app. DSLR cameras will require you to hold down the shutter half way. When you do this the camera will focus it its set to auto focus (this button is usually on the lens).
Exposure
You control this using the shutter speed, ISO & aperture (smartphone users don’t need to worry about aperture). This is called the exposure triangle.
Shutter speed is how long the shutter is open on your camera. If it is open for a long time more light will get in and if it is open for a short time less light will get in.
SHUTTER SPEED GUIDE
1/60 for a normal handheld photo
1/400 or faster for high speed
5 sec or slower for long exposure
Once you have set your shutter speed for the type of photo you need you can adjust your ISO and aperture to get a correct exposure that isn’t too light or too dark.
ISO these start around 100 and may go up to something like 3200 on your camera. You want it to be as low as it can be. ISO 100 is perfect. However if you are inside or it is dark you will need to increase your ISO.
Appeture for those cameras that have this option this controls how big or small the hole is in the lens. A bigger hole lets more light in than a small hole. Apperture settings look like this. f/4, f/5.6, f/8, f/11, f/14, f/22.
f/4 is a big hole and this is where your appeture options may start. f/22 is a small hole and this is where your appeture options may end. All you need to remember is the smaller the number the more light it will let in and the bigger the number the less light you will let in.
Start by choosing your shutter speed, then adjust your ISO and apperture until you get a correct exposure. A good starting point is
Shutter speed: 1/60 second
ISO: ISO200
Apperture: F/5.6
If you can control exposure you have done the hard part. Everything else is easy.
Crop
This is where you take the time to make sure everything looks right before you take the photo. Is your subject clearly visible in your photos. Are you happy with all the other things you can see.
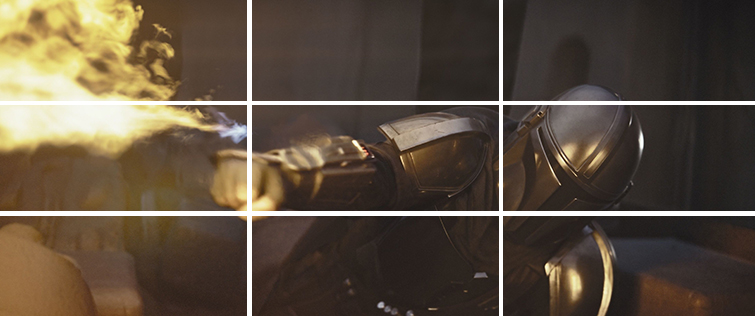
Composition – Rule of Thirds
Draw imaginary lines on your image to divide it into three sections. Is your subject in the middle, left or right. If they are then your photo is looking good. You can see on the photo below that the characters head is in the right hand third.
Challenge 2
Take two pictures to show you can control your exposure
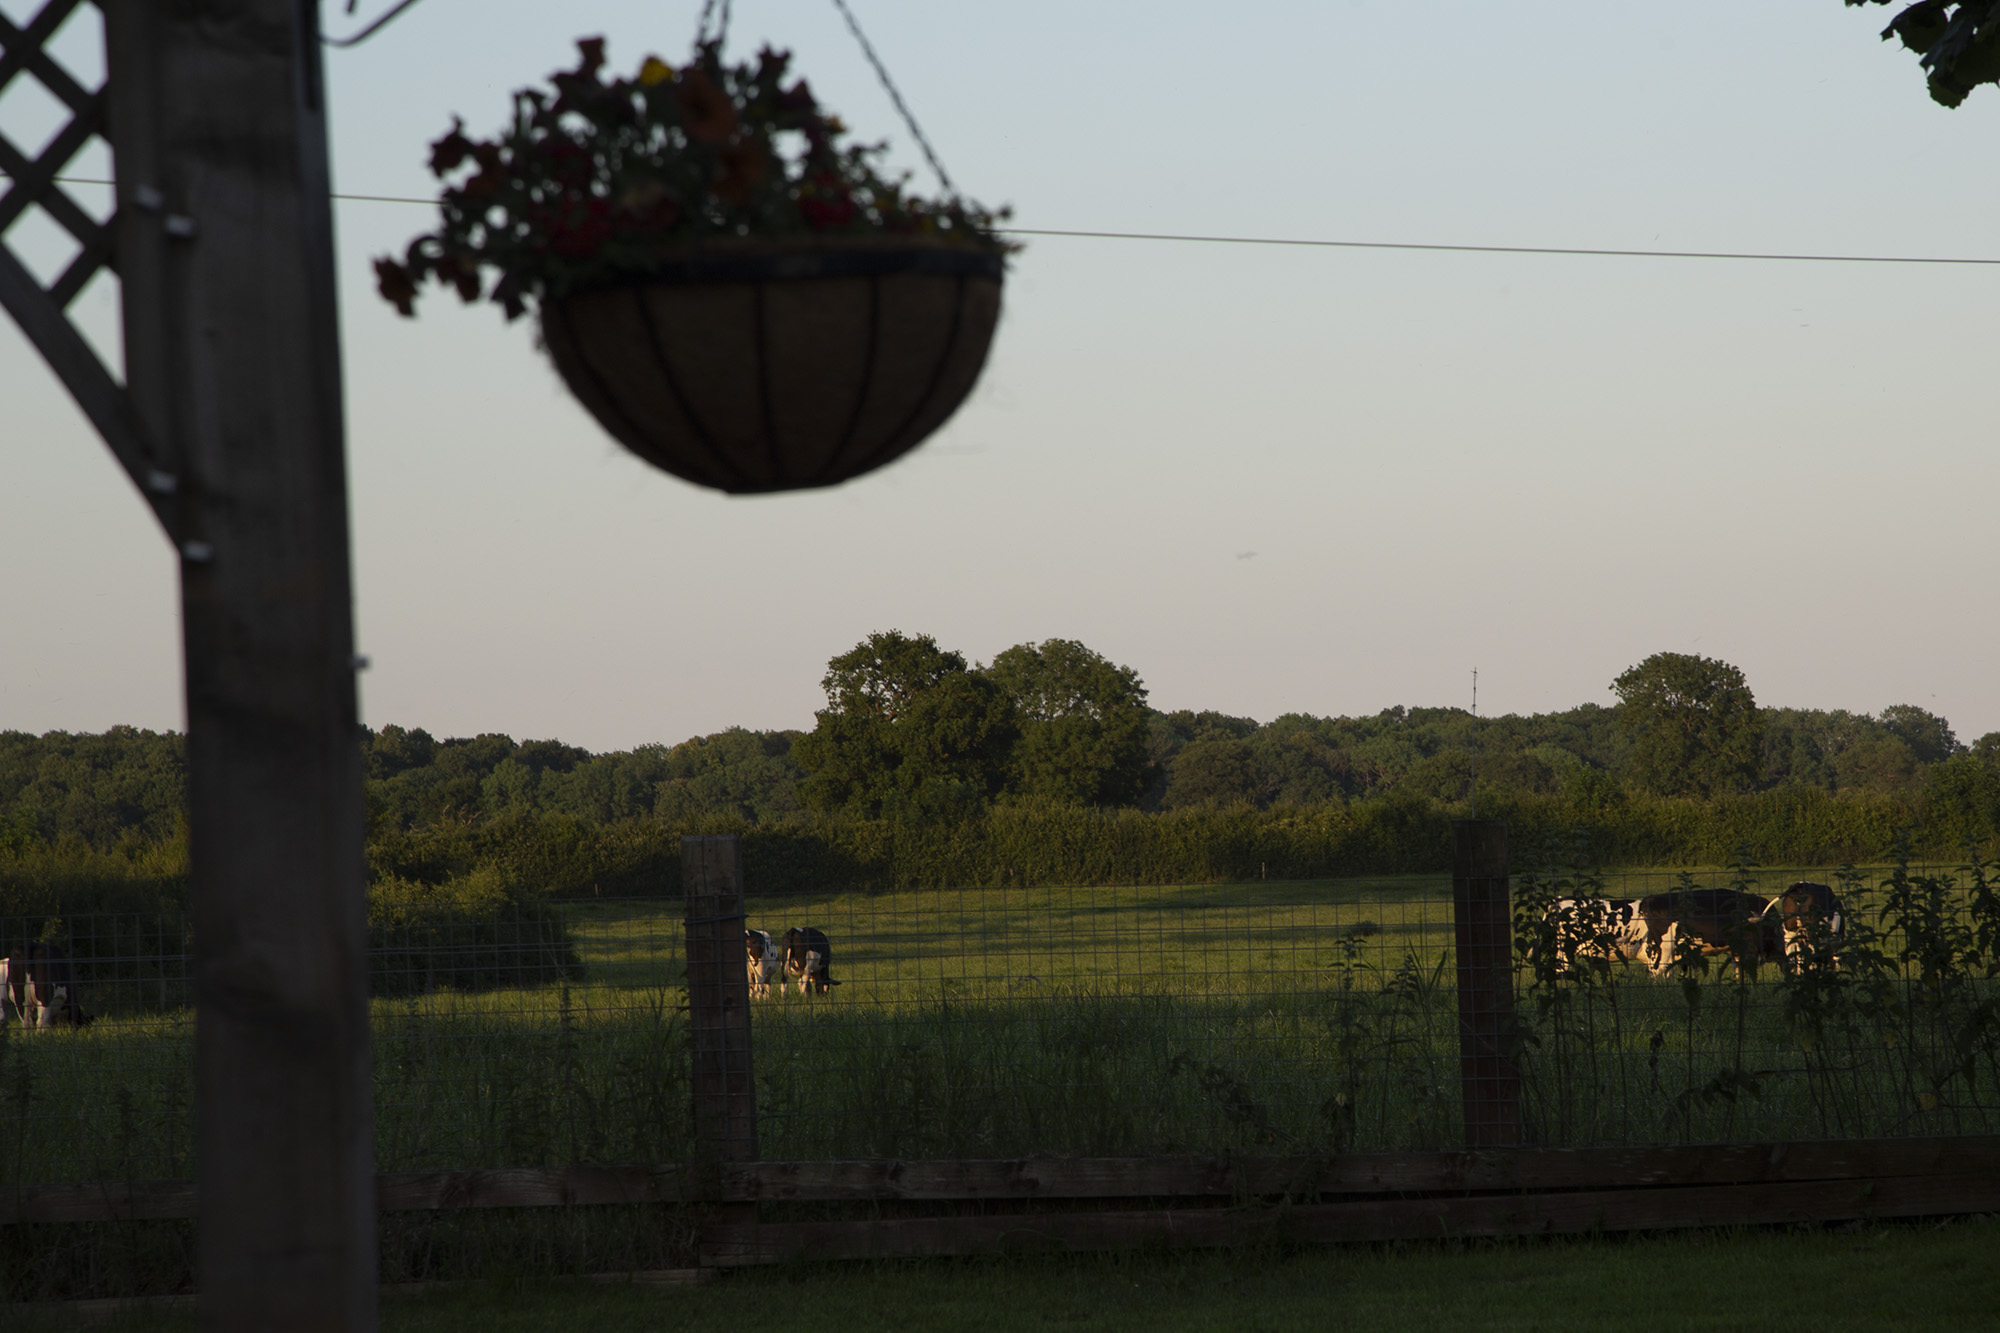
Take a photo from inside looking out of a window so you can see the sky. Place interesting items on the window sill so they can be seen in the shot. Using your ability to control the exposure on your camera take one photo with the sky correctly exposed (as you see it with your eyes) and with out moving the camera take another photo with the objects on the window sill correctly exposed.
Once these 2 images are done email them with your name and ‘challenge number’ to gsl@1stbedworth.co.uk . If you are stuck on a challenge don’t worry we will take time out each Thursday for you to ask questions.
Challenge 3
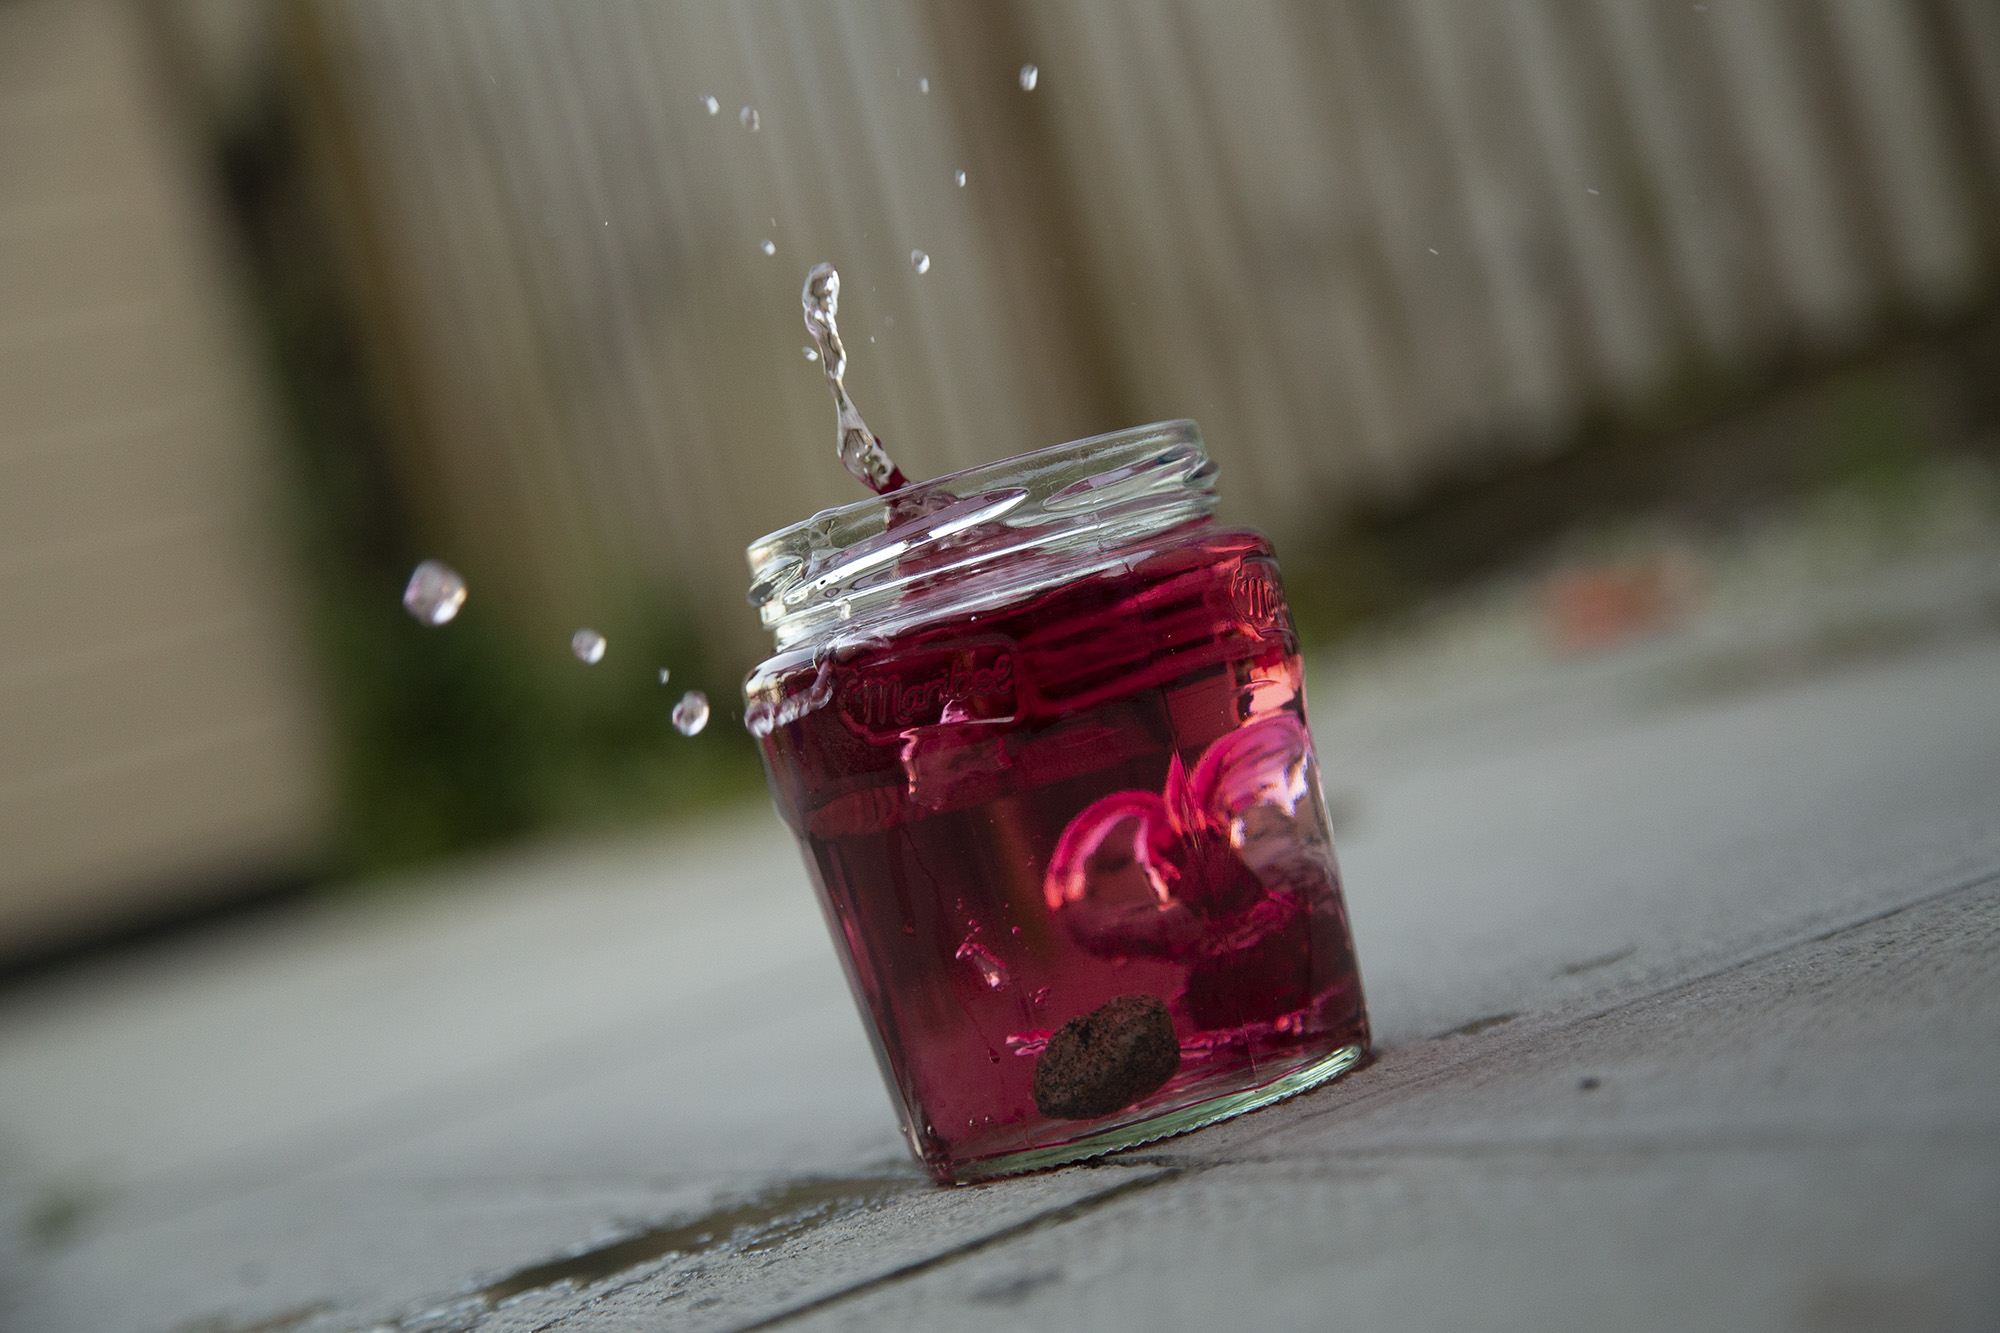
Take a high speed photo
Show that you can freeze motion by taking an image at a fast shutter speed. As per the badge night demonstration. Fill a container with a liquid and aim to freeze the splash as you drop a coin into it.
Tips…
- You will need a shutter speed of 1/500 or higher for this to work.
- It will be easier to shoot in bright sunlight.
- If your photo is too dark you may need to increase the ISO.
Once these are done email them with your name and ‘challenge number’ to gsl@1stbedworth.co.uk . If you are stuck on a challenge don’t worry we will take time out each Thursday for you to ask questions.
Challenge 4
Take a long exposure photo
Like the example photos seen in the demonstration (2nd July), shoot a long exposure photograph. This can be any long exposure photograph so long as the exposure is 5 seconds or longer.
To make this task easier I suggest you do the following…
1. Set your camera or smartphone up onto a steady surface
2. Get your settings correct so that you are taking a photo across 5 or more seconds
3. Use a torch to write your name in the image during one of the exposures

If you can master doing this you can then try any of the other long exposure tricks I showed you in the demo.
If you are struggling remember to ask on Thursday night next week.
Once these are done email them with your name and ‘challenge number’ to gsl@1stbedworth.co.uk . If you are stuck on a challenge don’t worry we will take time out each Thursday for you to ask questions.
Part 3 – Editting
After you take a photo you can use editing software on your phone or laptop to improve the image.
Most phones and laptops will allow some degree of editing in the built in software for viewing photos. This is often more than enough to make most basic corrections. Some of the main tools you should be using when editing are as follows
Crop
This allows you to cut your image down smaller and into any shape rectangle you want. This is useful for cutting out areas around your subject you do not want.
Straighten or rotate
This allows you to straighten out those wonky camera angles by turning your photo
Brightness
Was your photo a bit dark or light. Simply adjust it with the brightness tool
Colour
Make your colours look correct by using this tool to make them warmer or cooler. If you don’t get what this means just play with the tool and it will make sense.
Copy a photo from the gallery areas of the group website. Make at least two edits to it to improve the image. Send both the before and after image in to complete the challenge.
Challenge 5
Copy a photo from the gallery areas of the group website. Make at least two edits to it to improve the image. Send both the before and after image in to complete the challenge.
Once these are done email them with your name and ‘challenge number’ to gsl@1stbedworth.co.uk . If you are stuck on a challenge don’t worry we will take time out each Thursday for you to ask questions.
Part 4 – Accessories
There are many accessories which can help your photography from tripods which keep your camera steady on uneven ground to flashguns which can light your subject in various ways.
One of the easiest accessories to make yourself and one of the most useful accessories to have is a reflector. Purpose built reflectors for photography are collapsible disks of white or silver fabric that reflect light onto a subject. If you do not have one of these you can easily use a piece of card, paper or anything with a light reflective surface.
Challenge 6
Create a reflector using a white piece of paper or card. Take a photo of an interesting object with a strong light source behind it (maybe the sun) which means the front is too dark. Then without moving the camera use your home made reflector to reflect light onto the front of your object. Send these two photos (with and without) reflector to complete the challenge.
You can also try reflecting with different surfaces such as foil or even black card if you want to make a light area dark.
Once these are done email them with your name and ‘challenge number’ to gsl@1stbedworth.co.uk . If you are stuck on a challenge don’t worry we will take time out each Thursday for you to ask questions.